 In today's post we are going to take a few minutes of "prevention" to cure ourselves of non-essential stress & wasted time searching for files and emails.
I know what you are thinking... "I don't have time to organize my files and emails!". But actually (and I am guilty of it too) we don't have time to NOT organize at least part of our digital world. If you are like me, you have grown super dependent on search features, wishing there was a search bar in all aspects of your life! Searching is a great backup, but organizing is a time-saver!


Let's talk Labels!
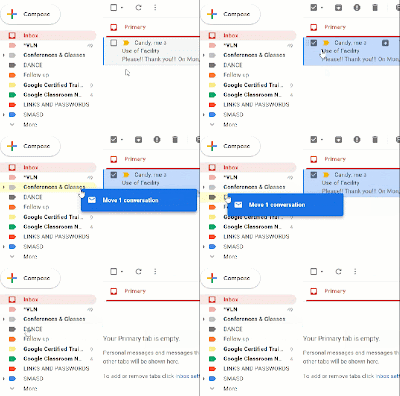
Labels are these guys on the side of your inbox at mail.google.com . We can add emails to these labels by dragging them in or using the toolbar at the top.
When we migrated from Outlook, we may have gotten some unnecessary labels that are cluttering up our sidebar.
To remove a label from the sidebar you can click the three dots, then choose remove or hide.
Some labels are default system labels set by Gmail. You cannot remove those but they can be hidden. After clicking the Gear icon > Settings> Labels > Show / Hide
- To create new labels, choose the label icon at the top of your inbox. (If you don't see it, you may have to choose an email first to have the toolbar appear.)
- Type in a label name > Create new
- Then you will have the option of "nesting" the label under an existing one. If you are uninterested, ignore this option.

Other tips & tricks for labels:
Color code the labels! Click the three dots to choose!

If you want the label to appear first, consider adding an asterisk * or another symbol so it comes first alphabetically. Click the three dots > Edit to change the name.
The little arrows make a label expand to view sub-labels. Hit the arrow again to collapse the list.
Next up is Google Drive...
Many of the same rules of labels apply for Google Drive folders.
- Color Code
- Put important folders first by using symbols to alphabetize.
- Expand your list with the small down arrow.
Know that there are two views to your Google Drive. List View & Grid View. Easily toggle back and forth with the button in the upper right. Grid view is great for seeing a thumbnail preview, while list view is optimal for seeing more files at once.
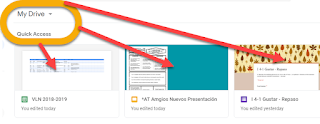
Lastly, by default your Google Drive comes with some "Quick Link" thumbnails at the top that allow you easy access to the most recent files. For me, they took up too much space and were in the way.
You can remove these quick access files by going to
Settings > uncheck Suggestions to make relevant files handy.
Remember! When creating Google Files such as Docs, Forms & Slides, it is best practice to go to your DRIVE FIRST! Open the folder where you want the new document to exist then create the file by choosing the "New" button. Then your file is safely stored where you can find it. It is truly opposite thinking from Microsoft tools. There you would create, then file. With Google you can open the folder, then create.
Looking for a one-on-one approach to getting Gmail and Drive organized? Set up a time!
jtamburlin.youcanbook.me
avollmer@smasd.org
acatalone@smasd.org


No comments:
Post a Comment