Showing posts with label Organization. Show all posts

Tuesday, May 21, 2019

End of Year Tech Check! - Save the Files!!

Only one more Tuesday to go!

The year has surely flown by.  You have all done so many great tech-infused activities in your classrooms, that we want to be sure we have them safe and secure for next year!  Take the following steps to not be a victim of file-loss in September!


1. Save your Files - Your teacher machine & Surface may go through re-imaging this summer. Be sure that you don't have anything saved locally (e.g. on your Desktop).  All of your files need to be in your Z Drive on the network and/or your Google Drive to be sure they are safe. 


Let me know if you would like me to stop by and see that you have everything where you need it!


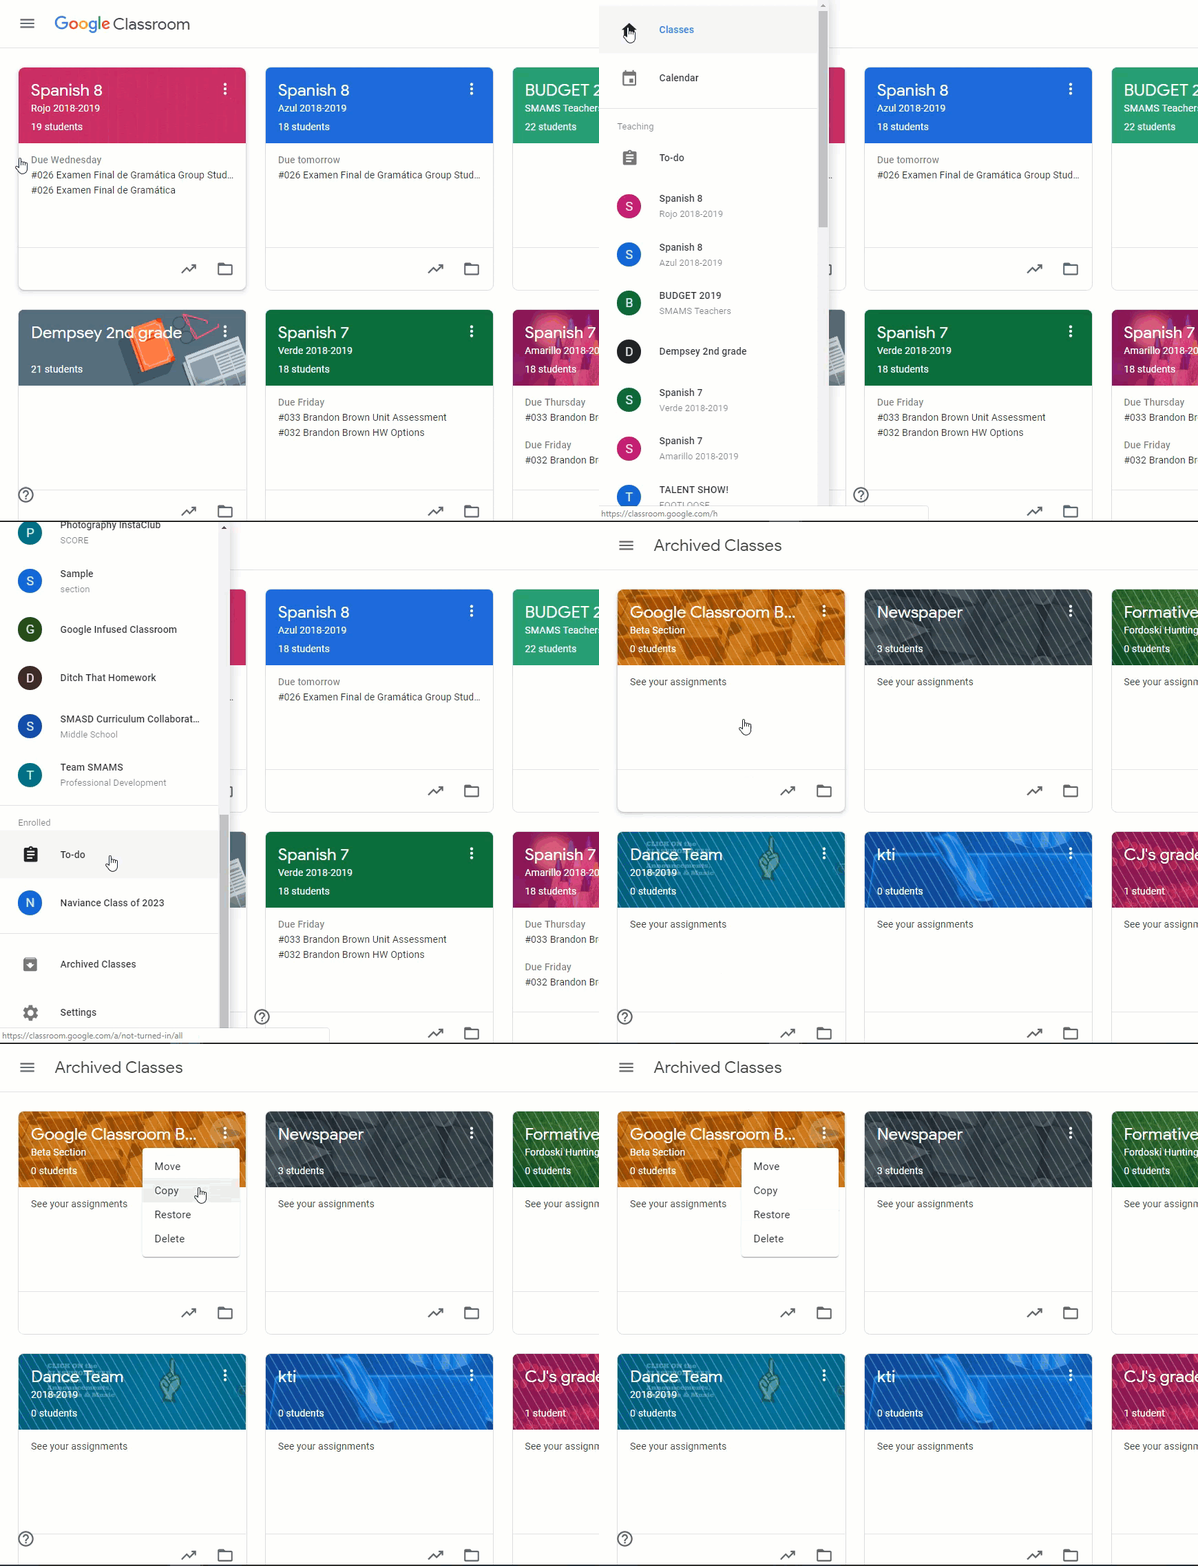
2. Archive Your Google ClassroomsStart with a clean slate next year, and avoid any unnecessary Ss comments, submissions etc over the summer.  You WILL still have access to the classrooms next year for reusing posts, etc. 


3. Get your To-Do lists ready. Google Keep and Google Calendar are great resources for planning out the start-of-year reminders.  Set yourself an alert for those first in-service days about the great ideas you have to improve your classes in 2019-2020!


Have a great end of the school year.  

Let us know what you need 
& any ideas you want to brainstorm for the fall.

Tuesday, April 30, 2019

Wakelet - Resources Where & When You Need 'Em

If you are like me, more and more of your ideas for lessons and resources that you use in class are online.   At this point in the game it may be overwhelming to figure out a best practice for saving and storing all of those links.


  • There is the bookmark bar at the top of your browser...


  • And of course, Pinterest has been a popular option for many of us, especially K-5 teachers!


Today I would like to offer you one more option for organizing your digital teaching resources.   It is this time of year that we are getting to that "To File" pile behind our desks, yet we still are accumulating more and more ideas that we want to try next year.


For this, I bring you WakeletWakelet is very much like a personal Pinterest account.


You curate collections of resources based on topics of your choice.  Some ideas of teacher collections could be:
  • Unit Resources
  • Tech Tools
  • Project Ideas
  • Strategies to Try in 2019-2020

Within each collection you can add any of the following:

  • Links to Websites
  • Images
  • Text Descriptions (Notes to Self)
  • YouTube Videos  
  • PDFs
  • Google Drive Files
  • Tweets! 


With the Wakelet Google Chrome Extension, it is easy to add resources as you use/find them.

Not sure how to create your own account?  Follow me as I sign up for Wakelet and add the Chrome Extenstion in this video tutorial.


Wakelets can be shared between teachers and students alike.   Encourage students to curate a portfolio or a resource set to explain key concepts as an alternative assignment! 

That said, click HERE to access & make a copy of my Formative Assessment Tools Wakelet.

And be sure to share your Wakelets with your colleagues and students!  


Tuesday, March 28, 2017

Google Classroom Housekeeping Checklist


Is your classroom in order? Do you have...?

  • A Naming Convention
  • A Copy for Every Student 
  • Initials for your Private Comments
  • Yearlong Resources on the About tab
  • A Late Submission Google Form

#001 Naming Convention:

The end of the quarter came and went.  Were you overwhelmed with the transfer of grades from Google Classroom to PowerSchool?   Did students come up and say "Hey, I need another copy of that one assignment thingy."?  

Keep it simple by implementing a naming/numbering convention for all your assignments.  Or at least your Google Classroom assignments.

I use Quarter + # + 3 Digit Number + Assignment Name.  It works great!  

E.g.  Q4 #001 Portfolio Project

A system like this (inspired by TeacherTech) will organize your Google Drive as well as your grades spreadsheet in Google Classroom.  With a glance you can see where you have left off transferring grades into PowerSchool.  (Or, there is the option of putting it all in as one Google Classroom grade as well.)

Now you & your students can have dialog that puts everyone on the same page.  
"James, You are missing assignment #007."


#002 Make a Copy for Every Student:

Never have your students start a Google Doc or Slides from scratch!   Always create at least a blank template for them to type on.  This allows you to watch the work from the first moment.  Click on the number "undone" to see their in-progress assignments.  Catch those who need redirected before you've spent 3 days in class working on it.  Feedback & turn around times are exponentially shortened with this procedure.  

This practice also avoids the "zero".  You know they have done something even if they didn't hand it in. 

#003 Initial your Private Comments:

One of the best parts about Google Classroom is the conversations you can have with your students regarding their work.  If you use a lot of private comments, it hard to notice who had the last word.  Students could have asked an additional question without you realizing that the conversation had continued beyond your feedback.

Eliminate this problem by adding your initials (E.g. SraT; JYT; MrsT; Teach) before your comment.  Then, with a quick glance you will be able to tell if any students were reaching out to you and if a reply is necessary.
Image By TeacherTech


#004 Yearlong Resources on the About Tab:


Are there links that your class frequently visits (online textbook; kahoot, online dictionary)?  Put them on the "About" tab for a quick resource.  This is also a great place for forms. I personally put a form for students to fill out when they have a question about a grade.  Make-up forms, bonus assignments, links to class albums & galleries can also be included on this tab.


#005 Late Submission Google Form: 

Another item that is appropriately placed on the "About" tab is a Late Submission Form.  Google Classroom automatically tags assignments as Not Done, Late, Done, Returned, Resubmitted etc.  There are also options for email notifications when an assignment comes in late.  These methods may work for some teachers, however others may find themselves going crazy checking for late & resubmitted assignments in a variety of places.

A Late Submission Form can put all  late and submitted assignments in ONE PLACE!  Students use this form to submit any assignment that is coming in late no matter the reason (absence, redo, optional assignment, etc.)  The form will create a spreadsheet that allows for student name, class period, assignment, reason for late submission, link to assignment & a place for you to put the grade.

The form could be attended to periodically by the teacher, then sorted and easily recorded into PowerSchool.  

Click here for an example form that you can remix and use for your classes. (You will be prompted to make a copy.)

Inspired by Tech&Learning 


Do you have other ways you keep your classroom in order?  Have you practiced any of the above recommendations?  

Share in the comments below.

Tuesday, May 24, 2016

Let's keep it CLEAN, St. Marys...

You clean your desk drawers, organize your filing cabinet and store away decorations.

But, where is digital organization on your list of to dos?

I must admit, I am very much a guilty party.  I had no idea where to begin when it came to digital clean up.  To get to my daily flipcharts I would navigate a maze of folders that I created years ago.  There was little rhyme or reason to the organization.  It was a path that I would spend an hour re-figuring out at the beginning of every year.


 Here are the 5 steps that I have been taking to start the process of digital clean up.  The initial task is daunting.  Once the organization process is established, it will become habit and your digital cleanup will be an ongoing process instead of the obstacle that you try to avoid.


NUMBER 1:  Google Keep .

  • Get the sticky notes off your computer screen.  keep.google.com gives you digital post it notes that follow you from classroom to classroom, device to device, school to home.
  • What a great way to make your to-do lists: 
    • End of year business 
    • Make up exams/work
    • Summer reminders
    • Classroom items you want to look to purchase
    • Things you want to remember for the start of next year
      • (Unlike that post it - the google keep note won't lose it's stick!)


You can even add links, check-off boxes, reminders, and share your notes with others.

NUMBER 2:  Get it in your PBox.


  • Check for files that you may have only saved locally on your machine:
    • Desktop Screen, Downloads Folder, Picture Folder etc.
  • Get these in your PBox asap.  Cut, Copy, Drag and Paste those files into your Y or Z drive to prevent their loss.
Next year: Get in the habit of doing this right away! - Don't wait until year's end.


NUMBER 3: Name those media files.

  • Media files have the tendency to save as generic names: 
    • WIN / IMG
    • the name of your camera
    • the timestamp
    • numerical order
This can make it very difficult to search for the image or video that you are looking for later.

  • You can bulk name your files very easily on your PC
    • Highlight all of the files that you want to rename in the same category
      • e.g.  MacBeth Videos 10th grade
      • 5th grade field trip 2016
    • Right Click and choose Rename 
      • it will seem like you are only renaming one file
    • Hit Enter
All of your files are now renamed "MacBeth Videos 10th grade (1, 2, 3, 4, ...)" 
"5th grade field trip 2016 (1, 2, 3, 4....)


NUMBER 4: Delete and Organize.

To find unused files: 
  • Open your PBox or any file within your PBox.  Click the Date Modified header to sort your files from oldest to newest.

  • Use your judgement... here I see I have files that have not been modified or opened since 2003, I am guessing those can go.... 
    • Hold Crtl as you clik through the ones you want to delete and then delete them all at once.
  • If you are worried about permanently deleting files, try making a folder called Old Files and keeping them there for another year, to see if you actually will access them.
To create folders: 
  • Right Click anywhere in your PBox.
  • Hover over New then click Folder
  • Find a filing system that works for  you.  I use a style similar to that of my actual paper filing cabinets.
  • Then Drag, Drop, Cut, Copy and Paste your way to a better organized drive.


What is Archiving?

  • Google Classrooms will appear in students' lists of classes until they are Archived by the teacher (or the student removes him/herself from your class)
  • Archiving a Classroom: 
    • Preserves your posts, assignments etc.
    • Removes them from your active classes screen, for organization
    • Gives you access to the posts, for reuse next year
    • Does not allow you or a student to further modify the class
    • Still allows you the option to restore the class if you need to reuse/modify it for any reason
How to Archive: 


  1. On the class card, click the dots and select Archive.
  2. To confirm, click Archive.


What tricks do you have for tidying your digital world?

Tuesday, September 15, 2015

Snipping Tools

Using Snipping Tools
You can use the Snipping Tool to capture a screen shot, or snip, of any object on your screen, and then annotate, save, or share the image.  This tool is very useful to insert partial or whole images into a Word document, PowerPoint presentation, online document, etc.
You can capture any of the following types of snips:
·         Free-form Snip.  Draw a free-form shape around an object.
·         Rectangular Snip.  Drag the cursor around an object to form a rectangle.
·         Window Snip.  Select a window, such as a browser window or dialog box that you want to capture.
·         Full-screen Snip.  Capture the entire screen.
After you capture a snip, it's automatically copied to the Clipboard and the mark-up window. From the mark-up window, you can annotate, save, or share the snip.

To capture a snip

·         Open Snipping Tool by clicking the Start button. In the search box, type Snipping Tool, and then, in the list of results, click Snipping Tool.
·         Click the arrow next to the New button, select Free-form Snip, Rectangular Snip, Window Snip, or Full-screen Snipfrom the list, and then select the area of your screen that you want to capture.

To capture a snip of a menu

If you want to capture a snip of a menu, such as the Start menu, follow these steps:
·         Open Snipping Tool by clicking the Start button. In the search box, type Snipping Tool, and then, in the list of results, click Snipping Tool.
·         After you open Snipping Tool, press Esc, and then open the menu that you want to capture.
·         Press Ctrl+PrtScn.
·         Click the arrow next to the New button, select Free-form Snip, Rectangular Snip, Window Snip, or Full-screen Snip from the list, and then select the area of your screen that you want to capture.

To annotate a snip

·         After you capture a snip, you can write and draw on or around the snip in the mark-up window.

To save a snip

·         After you capture a snip, click the Save Snip button in the mark-up window.
·         In the Save As dialog box, enter a name for the snip, choose a location where to save the snip, and then click Save.

To share a snip


·         After you capture a snip, click the arrow on the Send Snip button, and then select an option from the list.