Tuesday, December 11, 2018

Cultivating Curiosity with Technology

"Good Morning class.  Today you will learn _____________________________."


-  to identify and apply the Pythagorean Theorem
-  to name key people involved in the American Revolution
-  to determine the main idea of a text
-  to explain the rock cycle

Identifying learning goals and student objectives is certainly a "must-do" in our lessons.   Students benefit from knowing the target for learning.  However, for me, when a lesson starts with the objective followed by direct instruction, we have crushed a great opportunity to prepare the brain for learning.

Curiosity.

Curiosity can prepare the brain for learning.  Giving students opportunities to question and gather tidbits of information related to the upcoming lesson can help to build file folders in their mind where new information can be sorted, stored and connected to previous knowledge.

Explore. 

Most of you already know that I am a HUGE fan of HyperDocs.  (Bought the book, took the course, got the certificate, presented it at PETE & C, etc)  HyperDocs are a great way to start packaging blended lessons to guide you and your students through the learning process.  One of the reasons I love HyperDocs is that they are a reminder of how pedagogically we should be developing our instruction in each lesson or unit plan.  Click HERE to see a template. 


Now this post is specifically inspired by the 2nd phase of the Basic Hyperdoc Lesson Plan: EXPLORE.  And, before I begin, I want to point out how EXPLORE comes before EXPLAIN.  Yes! Students need time to explore the topic and develop questions and curiosities and activate what it is that they already know before you teach it.


"Curate a collection of resources (articles, videos, infographics, text excerpts, etc.) for students to explore a topic. "


A collection of resources. By having a collection you are now embedding student choice and differention in the exploration process!

*please note you do not have to use a HyperDoc lesson to incorporate "explore" into your teaching

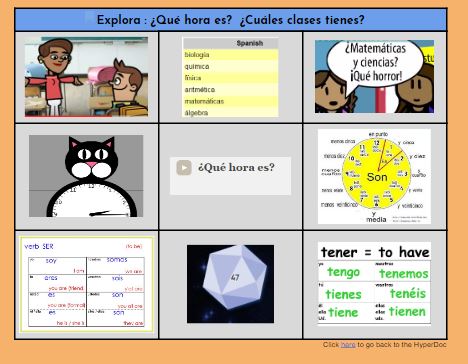
Explore: Multi-media Text Sets (MMTS)

- Gather a list of online resources related to your topic.  Include a variety of means for input.
  • Web Articles
  • Videos
  • Audio
  • Infographics
  • Tutorials
  • Images: Artwork/Photographs
  • Flashcards
  • Games (e.g. Quizlet/Gimkit)
- Prepare the links in a Google Doc

  • Create a Table 
  • Use Image Thumbnails to increase curiosity
  • Highlight text or image > Ctrl K > Create Hyperlink
- Define parameters
  • How many of the options should each student explore? 
  • Should they do one from each row?  

- Design a Reflection Process
  • How will the students record and share their new findings and curiosities? 
    • Class or Small Group Discussion
    • Google Form
    • Google Classroom Question
    • Padlet
    • Notes on the MMTS itself
- Deliver

  • Post to Google Classroom,or use a QR code 
  • Decide when / how you can create time for your students to "Explore"
    • after an assessment from the previous unit
    • small group work after your lessons "hook"
    • HW a few days out before the start of a lesson
- Reference & Reuse!
  • Be sure to get the most out of your MMTS use the resources in your lessons!  After the content is "explained" they will be looking at the resources through a new lens.
    • Send students back to resources based on Formative Assessment
    • Use games to review
    • Use images & video to spark writing prompts
    • Part of a differentiated station rotation


Interested in adding MMTS and/or learning more about HyperDocs?   Contact me to schedule a series of visits.  
In 2 or 3 visits we can have you up and running with an MMTS and/or HyperDoc for a new lesson in the new year! 

 jtamburlin.youcanbook.me or jtamburlin@smasd.org 


Tuesday, December 4, 2018

Control your Tabs!

More than ever, as teachers we are opening tons of tabs a day in Google Chrome.   

By lunchtime our browser can look like this...


Upon entering a classroom in the morning the average SMASD teacher probably has any to all of the following tabs open:

  • PowerSchool
  • Google Drive
  • ClassDojo 
  • Google Classroom
  • Google Calendar
  • Google Slides
  • Quizlet/Kahoot
  • Gmail

+ More depending on your content area and your lesson plans for the day! 

Opening & managing all these tabs can be frustrating and time consuming. 

In today's  Tech Tuesday, I want to show you how I manage my tabs with 3 clicks: 

- One Tab Chrome Extension

- Pin All Tabs Chrome Extension

- Close all tabs to the right / Close all other tabs


Check out this video tutorial to see how you can open all the tabs you need in the morning in 2 clicks! 


Click HERE to get the OneTab Chrome extension. 

Click HERE to get the Pin All Tabs Chrome extension. 


Want a one-on-one session to help you set your tech goals? 

acatalone@smasd.org
avollmer@smasd.org


Monday, November 19, 2018

Hour of Code

Don't Forget...Hour of Code is coming December 3rd-9th!

If your students participated in the past, then you know how much they enjoyed it!
If your students haven't participated before, now is the time to try it out!


Follow the participation guide below to get going!!


If you have any questions about the Hour of Code or Code.org, feel free to contact a tech coach!

Google Forms Quick Ideas


Tuesday, November 13, 2018

Flippity

Check out Flippity - a series of web apps that can easily turn a google spreadsheet into a set of online Flashcards or Quiz Show. There are cards for helping a teacher create random groups, or mix and match activities.  


 Go to Flippity website
Click HERE to visit Flippity


Wednesday, November 7, 2018

"NEW" Shortcut

Here is a quick shortcut tip...

   To open a new tab and create new item in any Google App, just do the following:

  • Press CTRL + T (this opens a new tab)
  • Next type in the item you want to create in the address bar and add .new on the end.


In the screen shot below CTRL + T opened a new tab and doc.new will open a new Google doc.


Tuesday, October 23, 2018

Incorporating Google Tools in Elementary Classrooms

Utilizing G Suite for Education fits naturally into many middle and high school classrooms. Due to the age of students in the elementary schools as well as a previously low number of compatible devices, these tools have not been used as widely at this level. However, if there was ever a time to begin incorporating them into elementary classrooms, the time is now! Chromebooks are becoming readily available in all elementary buildings and computer labs and some classrooms may still have desktops available too. Along with this is the fact that students in the elementary schools are being taught how to log into their district Google accounts and are being introduced to the basics of various tools during keyboarding class. Homeroom teachers can take advantage of students' new knowledge of these tools by incorporating them into their classrooms!


What types of basic activities might elementary students use G Suite for Education for?

These tools are a great way to go paperless by taking notes, writing reports and stories with Google Docs, creating presentations and journaling with Google Slides, graphing and documenting data with Google Sheets, and taking quizzes with Google Forms. Additionally GSuite tools make it easy for students to collaborate with each other and to share their work with teachers.

Check out some "outside-the-box" ideas from Eric Curts with 23 GSuite Ideas to Excite Kids About Learning! This is a transcript of Eric's podcast and includes links to specific details and tutorials on how to set-up each of the activities, like writing emoji stories and making motivational posters. 

There are also many elementary-level digital activities for use with Google Drive and Google Classroom that teachers have already created. A wide variety can be found on TeachersPayTeachers, these activities cover subjects across the curriculum, and some are even free if you want to check them out! Some examples include digital interactive reading and math notebooks, writing choice boards, and investigating simple machines. 

If you need a refresher on some of the basics of Google Drive and Google Classroom, check out some of our previous blog posts. When you visit the blog, you can search the archives by using the search bar in the top left corner of the screen, or by using the index tab. 

Google's tools are a great way to help students practice their digital skills, increase productivity, save time, and engage them in learning. If you need help getting started, let a tech coach know!

Thursday, October 18, 2018

Throwback Thursday with BreakoutEDU

With the holiday season fast approaching, starting with Halloween at the end of the month, I thought it would be a good time to remind everyone about BreakoutEDU


According to Jen's original post, BreakoutEDU is a great tool that:


  • Gets students out of their seats
  • Has them motivated & engaged with the content
  • Promotes collaboration
  • Allows the teacher to become a facilitator instead of a lecturer
  • Values the learning process as much as the learning objective

Check out her original post here. Since last year, the BreakoutEDU site has received a makeover to make it even more user friendly!

BreakoutEDU is a tool that can be used across content areas and grade levels and the team at BreakoutEDU is always creating new games (with a few new ones for Halloween released recently!). Most of the buildings have at least one Breakout Box, and if not, let a tech coach know and we can find you one to borrow.

In addition to the physical Breakout games, there are also now a ton of Digital Breakout games available. These games do not require a physical box and locks, and the game is played on devices (whatever you have available) instead. The Digital Breakouts are great because they require virtually no prep work and are just as engaging and challenging as the physical Breakouts. You can easily search the site for physical, digital, and hybrid options.

There are lots of free physical and digital Breakouts available, but there is also an option to purchase platform access for even more resources. I created a DonorsChoose.org project for a new Breakout box and Platform access and recently received these resources! With the platform access you can:

  • Create classes and have your students design their own Breakout EDU digital games! This is perfect for a new assignment option. As their teacher, you’ll be able to review their games and make them available for their peers to play in the classroom game library.
  • Access collections of subject-aligned digital games. New games are being added to the platform each week.
  • Access the Breakout EDU game library of more than 750 games.
  • Create your own custom Breakout EDU digital games for an engaging classroom activity.
If you need help getting started, let us know! Additionally, if you think you'd like to write a project for a Breakout box and/or platform access, Angie or I can help with that too! 


Tuesday, October 9, 2018

What's New with iOS 12?

It was about this same time last year that our blog featured details about the latest version of iOS. You may have noticed some new changes that have come along again with the recent update to iOS 12. With a large number of iPads at the elementary level and a variety of devices in the other schools here are my top 5 notable changes with iOS 12 that may impact teachers and students in the classroom. 

1.  Access  to the Control Center: I know I had a little bit of a panic moment right after the new update when I could not access the control panel by swiping up. A quick Google search that day let me know that with the new update you now need to swipe down from the top right side of the screen to access the control panel. This gives you quick access to mute sounds, adjust brightness, set timers, mirror the screen, access the camera, and more!


2. Swipe Up: So if swiping up on the screen does not bring up the Control Center, what does it do? A short swipe up will still bring up the App Dock, just as it did before; however, if you keep swiping up, you'll be returned to your Home screen (like pressing the Home button). I've read some speculation that this may be in preparation for future devices that don't have a Home button!


3. Updated QR Code Reader: The QR code reader was already part of the camera app brought to us with iOS 11. With this update though, instead of pointing the camera at the code, the code will be highlighted so you know it's been recognized. Additionally, you can add the QR code reader to the Control Center for easy access!


how to scan a qr code ios 12 1

To add additional features to your Control Center, Go to Settings and click on Control Center, which can be found right under General. From there you can add a variety of different controls, including the QR code reader.


4. Redesign of Voice Memos: There are lots of apps out there that allow students to record their voices, however, with the new update, students can record and edit right within the Voice Memos app. Students could use this to respond to a prompt, record themselves reading orally, record a musical composition or record an interview with a fellow student. Students can AirDrop the recording to the teacher, upload it to Drive, copy it into iMovie, and more!

5. Measure App: This cool feature is not supported by most of the iPads we have in the elementary schools, but many of you may have noticed it on your iPhones with the recent update. This tool gives you the ability to use your phone to measure and/or level and it is actually using Augmented Reality (AR) to make this happen! The app will prompt you to add a point if you are measuring a straight line and then you can stretch the line to measure your object. You can also measure rectangular objects and the app will calculate the area! This could be a great feature to show students when you're working on these concepts in math.

Have you tried any of these new features? Are there features with the new iOS that you love or hate? Drop us a comment below. Need help with a new feature? Please contact a tech coach and we'd be happy to help!


Tuesday, October 2, 2018

Tips to Keep it Tidy in Drive and Mail

September was a whirlwind of a beginning.  Now,  as fall is settling in we may find ourselves getting in a routine, yet left with the aftermath of another crazy school year start.

In today's post we are going to take a few minutes of  "prevention" to cure ourselves of non-essential stress & wasted time searching for files and emails.

I know what you are thinking... "I don't have time to organize my files and emails!".  But actually (and I am guilty of it too) we don't have time to NOT organize at least part of our digital world.  If you are like me, you have grown super dependent on search features, wishing there was a search bar in all aspects of your life!  Searching is a great backup, but organizing is a time-saver!


Let's talk Labels! 

Labels are these guys on the side of your inbox at mail.google.com .  We can add emails to these labels by dragging them in or using the toolbar at the top.


When we migrated from Outlook, we may have gotten some unnecessary labels that are cluttering up our sidebar.

To remove a label from the sidebar you can click the three dots, then choose remove or hide. 


Some labels are default system labels set by Gmail.  You cannot remove those but they can be hidden.  After clicking the Gear icon > Settings> Labels  > Show / Hide 


  • To create new labels, choose the label icon at the top of your inbox.  (If you don't see it, you may have to choose an email first to have the toolbar appear.)
  • Type in a label name > Create new 
  • Then you will have the option of "nesting" the label under an existing one.  If you are uninterested, ignore this option. 


Other tips & tricks for labels:

Color code the labels! Click the three dots to choose!


If you want the label to appear first, consider adding an asterisk * or another symbol so it comes first alphabetically.  Click the three dots > Edit to change the name.

The little arrows make a label expand to view sub-labels. Hit the arrow again to collapse the list.


Next up is Google Drive...

Many of the same rules of labels apply for Google Drive folders.

  • Color Code
  • Put important folders first by using symbols to alphabetize. 
  • Expand your list with the small down arrow. 


Know that there are two views to your Google Drive.  List View & Grid View.  Easily toggle back and forth with the button in the upper right.   Grid view is great for seeing a thumbnail preview, while list view is optimal for seeing more files at once.


Lastly, by default your Google Drive comes with some "Quick Link" thumbnails at the top that allow you easy access to the most recent files. For me, they took up too much space and were in the way. 


You can remove these quick access files by going to
Settings > uncheck Suggestions to make relevant files handy. 


Remember!  When creating Google Files such as Docs, Forms & Slides, it is best practice to go to your DRIVE FIRST!  Open the folder where you want the new document to exist then create the file by choosing the "New" button.  Then your file is safely stored where you can find it.   It is truly opposite thinking from Microsoft tools.  There you would create, then file.  With Google you can open the folder, then create.


Looking for a one-on-one approach to getting Gmail and Drive organized?  Set up a time!

jtamburlin.youcanbook.me
avollmer@smasd.org
acatalone@smasd.org


Tuesday, September 25, 2018

Tired of Kahoot ? - Meet Gimkit!

Kahoot, Quizlet Live & Quizizz are all awesome formative assessment tools for our students.

Each of them coming with their own set of pros & cons.  We love options for team play as well as homework mode. However, sometimes typing in multiple choice responses can be a drag.
Image result for gimkit

Gimkit is different.  It has the options of live mode and self paced.  You can play as a team or individually.  Questions are repeated, improving retention.  Multiple choice items are even automatically created from your term list.  But that is not all...

Gimkit adds one of the 4C's that I haven't seen a formative assessment game do yet, and that is
critical thinking.

As students answer questions and progress through the game, they earn money.
Image result for gimkitImage result for gimkit

This money can then be spent in the "store" mid-game to help make their money work for them.

Image result for gimkit store


Examples:  


  • Spend $50, and all future dollars will be multiplied by 1.5!
  • Purchase insurance, essentially giving you a lower copay for missed answers. 
  • Buy a bonus for correct answer "streaks"
  • Increase the amount you earn per question. 


Multiple Choice or Fill in the Blank !


Did you know ???  
Gimkit was made by a HS student!?!?! 
 A HS Senior in Seattle,  Josh Feinsilber, started it as a school project and now is its own company! 
Don't forget to remind your students of this when playing!


Check out this demo!


Want to play???  
Click HERE > Enter your first name > Play!


Need help making your first Gimkit? Click HERE

Reward yourself!  
Get to the badging center and earn an Act 48 hour per entry. 
(Not to mention the coveted badge!)

*Gimkit is free when you create up to 5 games!  Pay $7.99 for one month or $4.99 for a subscription.  Remember this is a HS project gone start up.  I can think of a lot of sillier ways that I've spent $7.99!